PCB Etching tutorial

Adding components and soldering

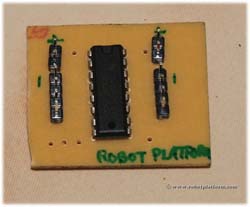
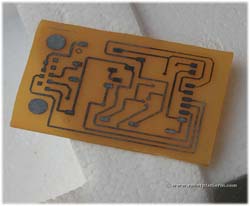
In the image you can notice that the components are soldered. If you wish, you can run solder across all the tracks which help to cover any breaks in tracks. It can also resist oxidation over those exposed copper tracks.

Etched and Soldered board - backviewEtched and Soldered board - frontview

Etching a board is so easy that I never consider using those perforated boards. But if you are starting with electronics, it is always advisable to begin with a bread board, then to a perforated board and finally into etching.
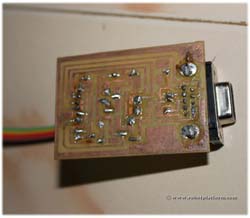
The below images shows an AVR programmer developed using the same etching method.

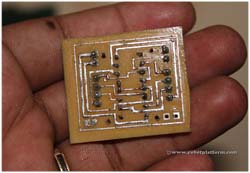
Other boards made using similar technique

Programmer boardAVR Programmer board

Step-by-Step PCB Etching Video tutorial

http://www.youtube.com/watch?v=kylGBBOfFc4


Tutorial index:

  1. Introduction to PCB etching using laser printer
  2. Paper Selection
  3. Printer Setup
  4. Preparing the Copper Board
  5. Transfer Toner from Paper to Board
  6. Etching Process
  7. Removing Toner from Board
  8. Drilling
  9. Adding Components & Soldering

Do you have anything to say?
Visit the Forum to discuss, learn and share anything related to robotics and electronics !!

rss feeds


Featured Videos


Advertisements


Recent Articles


Atmega8 Development Board


A great step-by-step tutorial on building your own Atmel AVR based Atmega8 development board. The board is ideal for beginners with detailed explanation and pictures More...

L293D Motor Driver


For robots to do work, you need to know how to control a motor. L293D is a cleverly packed IC which can control two DC motors in both directions: forwards and reverse. Here is a detailed explanation of building a board based on L293D ICMore...

Hobby Servo Tutorial


Servo Motor is a device which uses error-sensing feedback signals to determine and control the position of a motor shaft. The term "servomechanism" closely relates to servo motors..More...

Blinking LED Tutorial


This is similar to what we achieve in any "Hello World" program. However, it is not just limited to blinking LED but scratches the surface of AVR-GCC programming... More...


Kindly Donate

If this site has helped you, then kindly consider a Donation to say "Thank You!!". Donation might help us keep all this information available for free and also pay for the resources.

If that is difficult, then a simple "Hi" in the forum would still do good :)